Hi,
I will describe here how to create a Windows PE based boot media, a USB Stick or a boot CD, with some customization:
Language settings
- Language settings
- Keyboard settings
- Additional drivers
- Autostart a program
- Add Powershell
- Add .NET Environment
- Add WMI Support
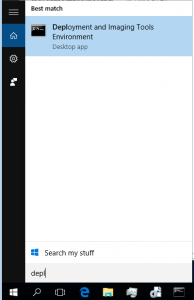
First of all download and install Windows 10 Assessment and Deployment Kit (ADK). The Installationprogram creates an shortcut for a command shell where the ADK environment is loaded at startup. Start it :-)!

I’m working with a set of variables this make the procedure more flexible. It assume that ADK 10 for Windows 10 is used and it is installed in the default folder. Otherwise adjust ADK_PTH and ADK_PACKAGE_PATH to values that fits your system. With the ARCH variable you can define if the target PE is 32Bit or a 64Bit system.
Note: Drivers you want to add must be for the same architecture.
Set ARCH=x86 for a 32Bit Windows PE and ARCH=amd64 for 64Bit.
set VMWARE_DRIVERS=C:\Install\VMware-Drivers-%ARCH%

set ADK_PATH=C:\Program Files (x86)\Windows Kits\10\Assessment and Deployment Kit

set ADK_PACKAGE_PATH=%ADK_PATH%\Windows Preinstallation Environment\%ARCH%\WinPE_OCs

set ARCH=amd64

set LANGUAGE=de-DE

set WIM_MOUNT_PATH=C:\mnt

if not exist "%WIM_MOUNT_PATH%" (

mkdir %WIM_MOUNT_PATH%

)

set WORKING_FOLDER=C:\iso

rmdir /s /Q %WORKING_FOLDER%

set OUTPUT_PATH=C:\Output

if not exist "%OUTPUT_PATH%" (

mkdir "%OUTPUT_PATH%"

)
Copy the base Windows PE System and mount boot.wim for some modifications
copype %ARCH% %WORKING_FOLDER%

dism /Mount-wim /WimFile:%WORKING_FOLDER%\media\sources\boot.wim /index:1 /MountDir:%WIM_MOUNT_PATH%
Create a Folder with all your drivers that your PE should recognize. And copy the drivers, in my example VMware Drivers, into it. dism examines the folder recursive so you can place all your drivers in this folder.
set VMWARE_DRIVERS=C:\Install\Drivers-%ARCH%

mkdir %VMWARE_DRIVERS%
Add the drivers
dism /image:%WIM_MOUNT_PATH% /Add-Driver /driver:%VMWARE_DRIVERS% /recurse

Searching for driver packages to install...

Found 7 driver package(s) to install.

Installing 1 of 7 - C:\Install\VMware-Drivers-amd64\Drivers\audio\vmaudio.inf: The driver package was successfully installed.

......
Add language and locales support. See directory which are supported:
dir "%ADK_PACKAGE_PATH%"
I will install support for german language
Dism /image:%WIM_MOUNT_PATH% /Add-Package /PackagePath:"%ADK_PACKAGE_PATH%\de-de\lp.cab"

Version: 10.0.10586.0
Image Version: 10.0.10586.0
Processing 1 of 1 – Adding package Microsoft-Windows-WinPE-LanguagePack-Package~31bf3856ad364e35~amd64~de-DE~10.0.10586.0
[========================= 44.0% ]
You can use the following command to show what languages are currently installed in your Windows PE
C:\>Dism /image:%WIM_MOUNT_PATH% /Get-Intl
Set Keyboard layout and Timezone
To get a list of all possible Keyboard layouts open Powershell and enter
dir "HKLM:\SYSTEM\CurrentControlSet\Control\Keyboard Layouts"|%{write-host -NoNewline ($_.PSChildname+":");$_.GetValue("Layout Text")}
...
00000405:Czech
00000406:Danish
00000407:German
00000408:Greek
...
The equivalent for possible Timezones:
dir "HKLM:\SOFTWARE\Microsoft\Windows NT\CurrentVersion\Time Zones"|%{write-host -foregroundcolor green -NoNewline ($_.PSChildname+":");$_.GetValue("Display")}
For a Windows fully localized to german language call dism as followed
Dism /image:%WIM_MOUNT_PATH% /Set-UILang:%LANGUAGE% /Set-Syslocale:%LANGUAGE% /Set-InputLocale:407:00000407 /Set-TimeZone:"W. Europe Standard Time"

Input locale has been set to: 407:00000407

System locale has been set to: de-DE

UI language has been set to: de-DE

The time zone has been set to: W. Europe Standard Time

The operation completed successfully.
Install Packages for WMI, .NET, Powershell and some other stuff. Possible other packages are listed here..
Dism /image:%WIM_MOUNT_PATH% /Add-Package /PackagePath:"%ADK_PACKAGE_PATH%\WinPE-WMI.cab"
Dism /image:%WIM_MOUNT_PATH% /Add-Package /PackagePath:"%ADK_PACKAGE_PATH%\%LANGUAGE%\WinPE-WMI_%LANGUAGE%.cab"

Dism /image:%WIM_MOUNT_PATH% /Add-Package /PackagePath:"%ADK_PACKAGE_PATH%\WinPE-NetFx.cab"
Dism /image:%WIM_MOUNT_PATH% /Add-Package /PackagePath:"%ADK_PACKAGE_PATH%\%LANGUAGE%\WinPE-NetFx_%LANGUAGE%.cab"

Dism /image:%WIM_MOUNT_PATH% /Add-Package /PackagePath:"%ADK_PACKAGE_PATH%\WinPE-Scripting.cab"
Dism /image:%WIM_MOUNT_PATH% /Add-Package /PackagePath:"%ADK_PACKAGE_PATH%\%LANGUAGE%\WinPE-Scripting_%LANGUAGE%.cab"

Dism /image:%WIM_MOUNT_PATH% /Add-Package /PackagePath:"%ADK_PACKAGE_PATH%\WinPE-PowerShell.cab"
Dism /image:%WIM_MOUNT_PATH% /Add-Package /PackagePath:"%ADK_PACKAGE_PATH%\%LANGUAGE%\WinPE-PowerShell_%LANGUAGE%.cab"

Dism /image:%WIM_MOUNT_PATH% /Add-Package /PackagePath:"%ADK_PACKAGE_PATH%\WinPE-DismCmdlets.cab"
Dism /image:%WIM_MOUNT_PATH% /Add-Package /PackagePath:"%ADK_PACKAGE_PATH%\%LANGUAGE%\WinPE-DismCmdlets_%LANGUAGE%.cab"

Dism /image:%WIM_MOUNT_PATH% /Add-Package /PackagePath:"%ADK_PACKAGE_PATH%\WinPE-StorageWMI.cab"
Dism /image:%WIM_MOUNT_PATH% /Add-Package /PackagePath:"%ADK_PACKAGE_PATH%\%LANGUAGE%\WinPE-StorageWMI_%LANGUAGE%.cab"

Dism /image:%WIM_MOUNT_PATH% /Add-Package /PackagePath:"%ADK_PACKAGE_PATH%\WinPE-EnhancedStorage.cab"
Dism /image:%WIM_MOUNT_PATH% /Add-Package /PackagePath:"%ADK_PACKAGE_PATH%\%LANGUAGE%\WinPE-EnhancedStorage_%LANGUAGE%.cab"
It’s time to copy your files to the Windows PE.
If you want to start a custom file when Windows PE boots use one of the following methods.
Method 1
Create a ini file %WIM_MOUNT_PATH%\windows\system32\Winpeshl.ini
[LaunchApp]

AppPath = %SYSTEMDRIVE%\yourApplication.exe

[LaunchApps]

%SYSTEMDRIVE%\mydir\yourApplication1.exe,/Parameter1 /Parameter2

C:\Program Files\yourApplications\application2.exe,/Parameter1 /Parameter2
Method 2
Edit %WIM_MOUNT_PATH%\windows\system32\startnet.cmd
and append your Applications at the end of the file below wpeinit.
Unmount the wim file and commit all changes to boot.wim
dism /Unmount-Image /MountDir:%WIM_MOUNT_PATH% /Commit
If you want to boot directly in Windows PE without answering the question “Press any key to boot from the CD or DVD” delete the bootfix.bin file.
del %WORKING_FOLDER%\media\Boot\bootfix.bin
Create an bootable ISO CD Image. Force CD Size (limited to 681984000 Bytes)
oscdimg -n -b%WORKING_FOLDER%\fwfiles\etfsboot.com %WORKING_FOLDER%\Media %OUTPUT_PATH%\WindowsPe.iso
or to create a independent ISO (CD/DVD) use
MakeWinPEMedia /ISO %WORKING_FOLDER% %OUTPUT_PATH%\WindowsPe.iso
To build an bootable USB Stick:
- Plugin in the stick
- Start diskpart and format your stick. Choose the right one 🙂 !! Diskpart will erase the whole disk you choosen!!!!
DISKPART> list diskDatenträger ### Status Größe Frei Dyn GPT
--------------- ------------- ------- ------- --- ---
Datenträger 0 Online 476 GB 0 B
Datenträger 1 Online 4000 MB 0 BDISKPART> select disk 1
DISKPART> clean
DISKPART> create partition primary
DISKPART> format FS=fat32 LABEL=USBBoot QUICK
DISKPART> ACTIVE
DISKPART> ASSIGN
DISKPART> EXIT
Now copy all the content of %OUTPUT_PATH%\WindowsPe.iso (You can open it with 7-ZIP or mount it the iso file over Windows context menu) to the root of your USB Stick.
Thats it.
Michael
Great informations, thank you Michael!
What kind of VMware driver do you copy in the above folder %VMWARE_DRIVERS%?
Where did you get it?
I’m looking for a Windows 10 PE with working network drivers INSIDE VMWare Workstation.
Unfortunately every ready-to-use-Win10PE I found so far doesn’t work inside VMWare.
Hi Peter,
setup a Windows VM and install the VMware Tools. The installer places all VM related drivers into “C:\Program Files\Common Files\VMware\Drivers”
    Directory: C:\Program Files\Common Files\VMware\Drivers


Mode                LastWriteTime         Length Name
----                -------------         ------ ----
d-----       27.04.2017     09:14                audio
d-----       27.04.2017     09:14                memctl
d-----       27.04.2017     09:14                mouse
d-----       27.04.2017     09:14                pvscsi
d-----       27.04.2017     09:14                video_wddm
d-----       27.04.2017     09:14                vmci
d-----       27.04.2017     09:14                vmxnet3
d-----       27.04.2017     09:14                vss
Michael